When a robot mower starts slipping on slopes, spinning in place, or wandering off course, most people blame the software. Nine times out of ten the real culprit is dirt. Grass, mud, and clippings pack into wheel treads and smear across the little sensors that keep the machine oriented, and performance quietly falls apart. The fix is a rag, a brush, and fifteen minutes. I clean my own mower's wheels and sensors every couple of weeks in peak season, and it has never once gotten stuck on a slope it used to climb fine. Here is exactly how to do it without damaging anything delicate.
Step 1: Power Down and Stay Safe
Never clean a robot mower with the power on. Switch it off completely using the main power switch or stop button, not just a pause in the app, so the blades and drive motors cannot engage while your hands are near them. If your model has a removable safety key or a PIN-protected off state, use it. Move the machine to a workbench or a clean patch of ground where you can flip it over safely. Wear a glove on the hand that goes near the blade disc even though you are not touching blades directly. This first step takes ten seconds and removes the only real risk in the whole job.
If you are just getting oriented, Robot Mower Maintenance: The Complete Guide is the best place to begin.
Step 2: Clear the Drive Wheels of Packed Debris
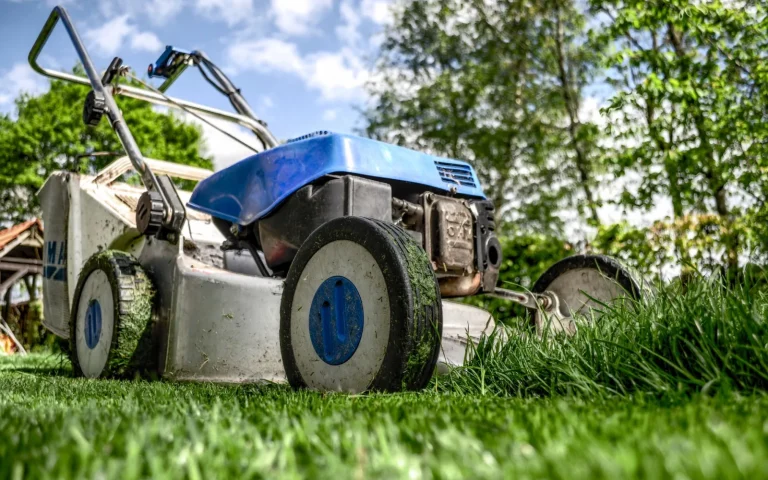
The large rear drive wheels do the hard work, and their deep treads are magnets for packed mud and grass. Turn the mower over and look at each wheel. Use a plastic scraper or an old screwdriver to dig compacted debris out of the tread grooves, then finish with a stiff brush to clear the fine stuff. Spin each wheel by hand and listen for grit or resistance; a healthy wheel turns freely and quietly. Pay attention to the axle area where grass wraps and binds. Clogged treads are the number one reason a mower that used to handle a 30 percent slope suddenly spins its wheels and gives up.

Step 3: Free the Front Caster or Guide Wheels
The small front wheels, often swiveling casters, steer the mower and jam more easily than the drive wheels. Grass wraps tightly around the thin axle of a caster and stops it rotating, which makes the mower drag and veer. Pull or brush the wrapped grass away, and if the wheel pops off easily on your model, remove it to clear the hidden buildup underneath. Check that the caster swivels smoothly in every direction once cleaned. A seized front wheel makes the mower fight its own steering, missing spots and wandering off its route. Two minutes of attention here fixes navigation problems that look far more serious than they are.
Step 4: Wipe the Sensors and Contact Points
Sensors are where cleaning turns delicate. Locate the lift and tilt sensors, the bump or obstacle sensors around the shell, and any rain sensor on top. Wipe each gently with a soft, slightly damp cloth, never a scraper or abrasive pad that could scratch a lens or dent a contact. If your mower uses cameras or ultrasonic sensors for navigation, a smudged lens genuinely confuses it, so clean those with the same care you would give eyeglasses. Do not spray water directly at any sensor or opening. A gentle wipe restores the mower's senses; harsh cleaning can blind it permanently, so err firmly on the side of gentle.
Wheel and Sensor Cleaning Kit and Steps
- Power the mower fully off, never just paused in the app
- Use a glove on the hand nearest the blade disc
- Plastic scraper or old screwdriver for packed tread debris
- Stiff brush for the fine grass in wheel grooves
- Clear grass wrapped around front caster axles
- Remove front wheels if they pop off to reach hidden buildup
- Soft, slightly damp cloth for lift, tilt, and bump sensors
- Clean camera or ultrasonic lenses as gently as eyeglasses
- Never spray water directly at any sensor or opening
- Wipe charging contacts and de-oxidize with a pencil eraser
- Confirm all wheels spin and swivel freely before reassembly
- Test a short run on level ground, then clean every two weeks
Many readers move on to How Long Do Robot Mowers Last? next.
Step 5: Clean the Charging and Boundary Contacts
While the mower is flipped, find the metal charging contacts, usually a pair of strips or pins on the front or underside that meet the base station. A season of docking leaves them dull, and a dull contact can stop a full charge. Wipe them with a dry cloth, and if they look oxidized, a light rub with a pencil eraser or fine emery cloth brings the shine back without removing metal. Do the same on the matching contacts of the base station. On boundary-wire models, clean any guide-wire contact points too. Clean contacts mean the mower charges fully and reliably, which quietly prevents a whole category of charging complaints.

It is worth skimming general lawn mower mechanics for extra context.
Step 6: Reassemble, Test, and Set a Rhythm
Put any removed wheels back, confirm everything clicks or screws firmly into place, and let damp areas dry before powering up. Set the mower on level ground, switch it on, and watch the first minute of a run. It should track straight, climb its usual slopes, and dock cleanly. If it still slips or wanders, recheck the front caster and drive treads, since a missed clump is the usual reason. Then set a cleaning rhythm: every two weeks in peak growth, monthly when slower. Wheels and sensors are the parts that most reward a regular light clean, and skipping them is what turns a smooth mower into a stubborn one.
The takeaway
Wheels and sensors are the humble parts nobody thinks about until the mower starts misbehaving, and they are also the easiest to keep right. Power down, clear the treads and casters, wipe the sensors and contacts with the gentleness they need, and test a short run before you walk away. Build it into a two-week rhythm during peak season and most of the stuck-on-a-slope, wandering, will-not-charge complaints simply never happen. It is fifteen minutes of low-glamour work, but it is the fifteen minutes that keeps a robot mower doing its quiet job while you get on with yours.
Our companion piece, Robot Mower Blade Types Explained, picks up where this leaves off.